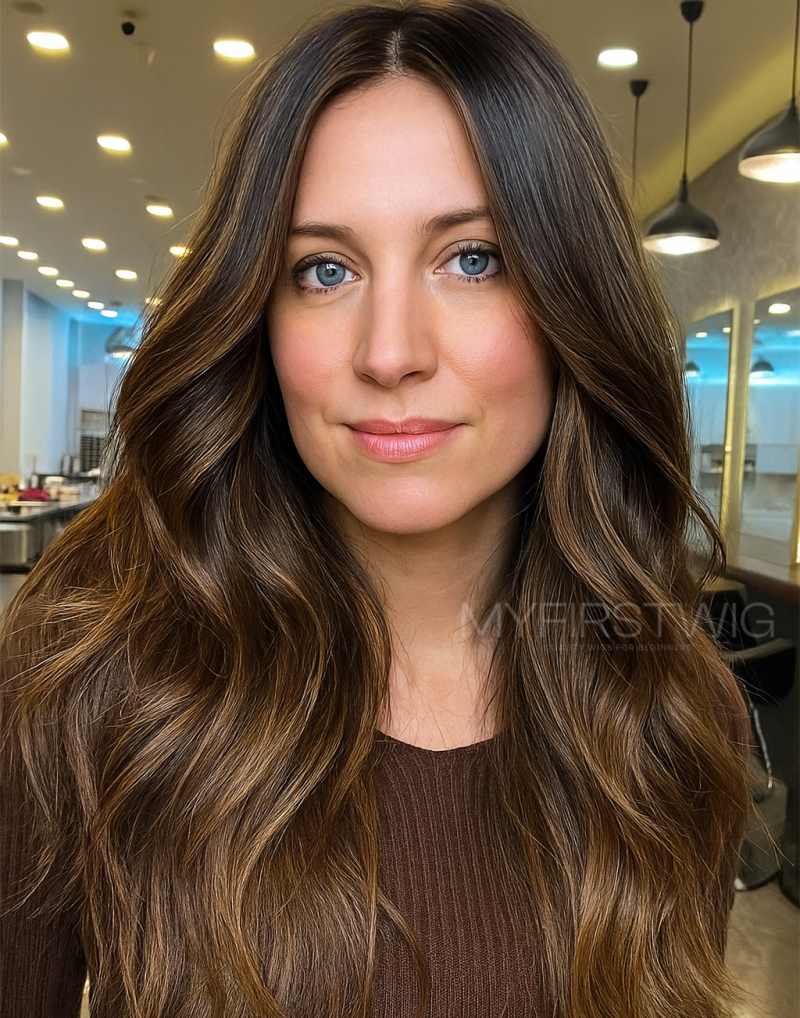
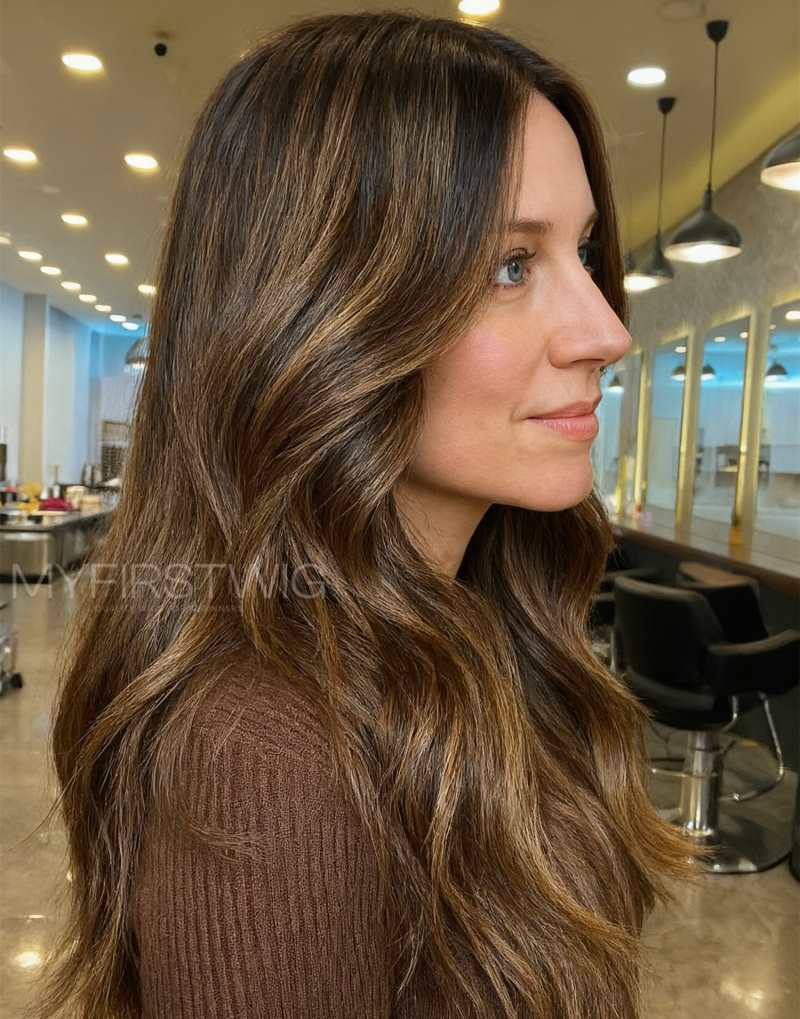
Applying a silk base topper can feel a little unfamiliar at first, especially if you are new to hair pieces or experiencing thinning around the parting or crown. The good news is that once you understand placement, clipping and blending, a silk base topper can become a simple part of your daily routine.
A silk base topper is designed to sit over areas of thinning hair and create the appearance of a natural scalp. It is often a good option for women who still have enough natural hair for clips to grip into, particularly around the crown or parting. MyFirstWig UK notes that toppers are generally suited to thinning at the crown or parting, while full wigs are usually better for more extensive hair loss or total alopecia.
For women dealing with early to moderate thinning, a well-fitted hair topper for thinning hair can add coverage, volume and softness without needing a full wig.
What Is a Silk Base Topper?
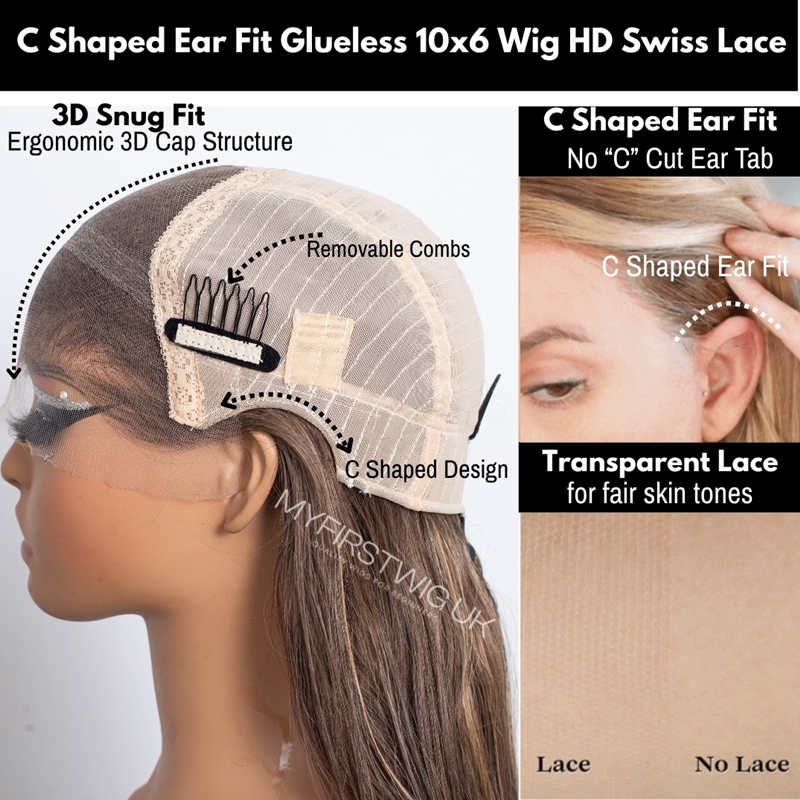
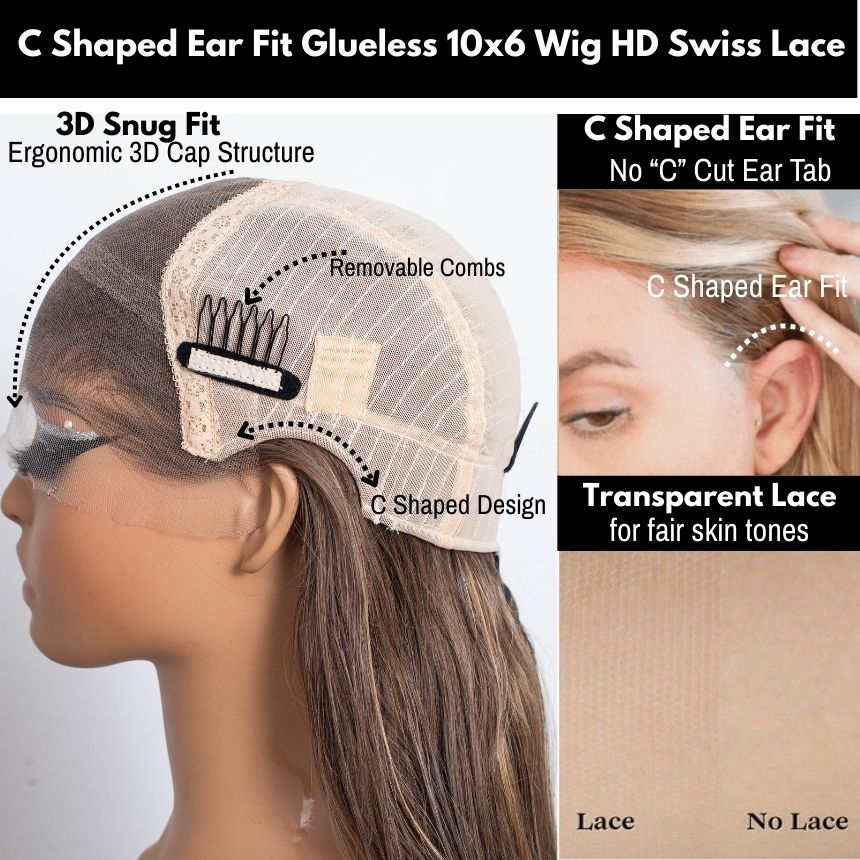
A silk base topper is a partial hairpiece that covers thinning areas on the top of the head. The “silk base” refers to the construction at the top of the topper, where the hair appears to grow from a soft scalp-like layer. This helps hide knots and creates a realistic parting effect. Some silk base toppers use clips, while others may use additional tape depending on the wearer’s needs and the design of the piece.
Silk base toppers are especially helpful if you have:
- A widening parting
- Thinning at the crown
- Reduced volume on top
- Early-stage female pattern thinning
- Postpartum or stress-related shedding
- Hair that looks sparse under bright light
They do not treat hair loss, but they can help create the appearance of fuller, more balanced hair while you decide what support or styling option feels right for you.
Featured Snippet Answer: How Do You Apply a Silk Base Topper?
To apply a silk base topper, part your natural hair where you want the topper to sit, open all the clips, position the front edge slightly behind your natural hairline, secure the front clips first, then press the topper flat and close the side and back clips. Finally, blend your natural hair with the topper using gentle brushing, light heat styling if suitable, and a little styling product if needed.
Before You Start: Prepare Your Hair and Topper
Before applying your silk base topper, take a few minutes to prepare both your natural hair and the topper. This makes a noticeable difference to comfort and realism.
Start with dry, detangled hair. If your natural hair is freshly washed and very soft, the clips may feel less secure. In that case, a small amount of dry shampoo or texture spray at the roots can help create grip. Some topper guides also suggest gently teasing the roots where clips will attach, which can give the clips a more stable base.
Then check your topper:
- Make sure all clips open and close smoothly.
- Gently brush the topper from ends to roots.
- Check the parting direction before placing it.
- Lightly shake the topper to help the hair fall naturally.
- Adjust the parting if needed before clipping it on.
Avoid pulling hard on the silk base or brushing aggressively near the knots. A gentle approach will help preserve the topper’s shape and longevity.
How to Apply a Silk Base Topper Step by Step
Step 1: Find Your Natural Parting
Stand in front of a mirror in natural light if possible. Part your natural hair where you usually wear it, or where the topper’s parting is designed to sit.
A silk base topper often looks most realistic when the parting of the topper follows your usual parting direction. If you normally wear a side parting, avoid forcing a centre part unless the topper has been designed or customised for that look.
Step 2: Position the Front Edge
Place the topper gently on top of your head. The front edge should usually sit slightly behind your natural hairline, not directly on the forehead.
For many women, leaving a small amount of natural front hair out helps the topper blend more softly. If you have thinning near the hairline, choose a placement that gives coverage without making the front edge look too far forward.
A good check: the topper should feel balanced, not sliding backwards or sitting too heavily at the front.
Step 3: Open All the Clips
Before securing anything, make sure all clips are open. This prevents tugging and allows you to adjust placement without catching your natural hair too early.
Most clip-in toppers use pressure-sensitive clips. These should be pressed closed gently once in position. Do not force them shut if they are sitting on a sensitive area or pulling too tightly.
Step 4: Secure the Front Clips First
Once the topper is positioned correctly, secure the front clips first. Slide each clip gently into your natural hair, then press it closed.
Try not to pull the topper forward as you clip. Instead, let it sit naturally and close the clips where the base already lies flat.
If the clip feels painful, too tight or is pulling on fragile hair, release it and reposition. Comfort matters. A topper should feel secure, but it should not hurt.
Step 5: Smooth the Base Flat
After the front clips are secure, lightly press the silk base down with your fingers. Check that there are no bumps, lifted edges or folded areas.
The topper should follow the shape of your head. If it feels raised at the crown, it may be positioned too far forward, too far back or over too much tucked-up natural hair.
Step 6: Secure the Side and Back Clips
Next, close the side clips, followed by the back clips. Use one hand to hold the topper steady while the other hand secures each clip.
Do this slowly the first few times. Rushing can make the topper feel uneven or create unnecessary tension.
Once all clips are closed, gently move your head from side to side. The topper should feel stable but not tight.
Step 7: Blend Your Natural Hair
This is the step that makes the biggest visual difference.
Use a wide-tooth comb, paddle brush or your fingers to blend your natural hair with the topper. Focus on the sides, front and ends. If the topper is made from human hair, you may be able to use gentle heat styling, but always follow the care instructions for your specific piece.
For the most natural result:
- Blend the front hair softly over the topper edge.
- Match the texture of your natural hair and topper.
- Curl or straighten both together if suitable.
- Avoid overloading the roots with heavy product.
- Use a light serum only on the mid-lengths and ends.
A silk base topper should not look overly perfect. A little natural movement around the face often makes it appear more believable.
Common Mistakes When Applying a Silk Base Topper
Placing It Too Far Forward
One of the most common beginner mistakes is placing the topper too close to the forehead. This can make the hairline look heavy or unnatural.
Try moving the topper slightly back and leaving some natural front hair out where possible.
Choosing the Wrong Base Size
If the base is too small, it may not fully cover the thinning area. If it is too large, it may feel bulky or difficult to clip securely.
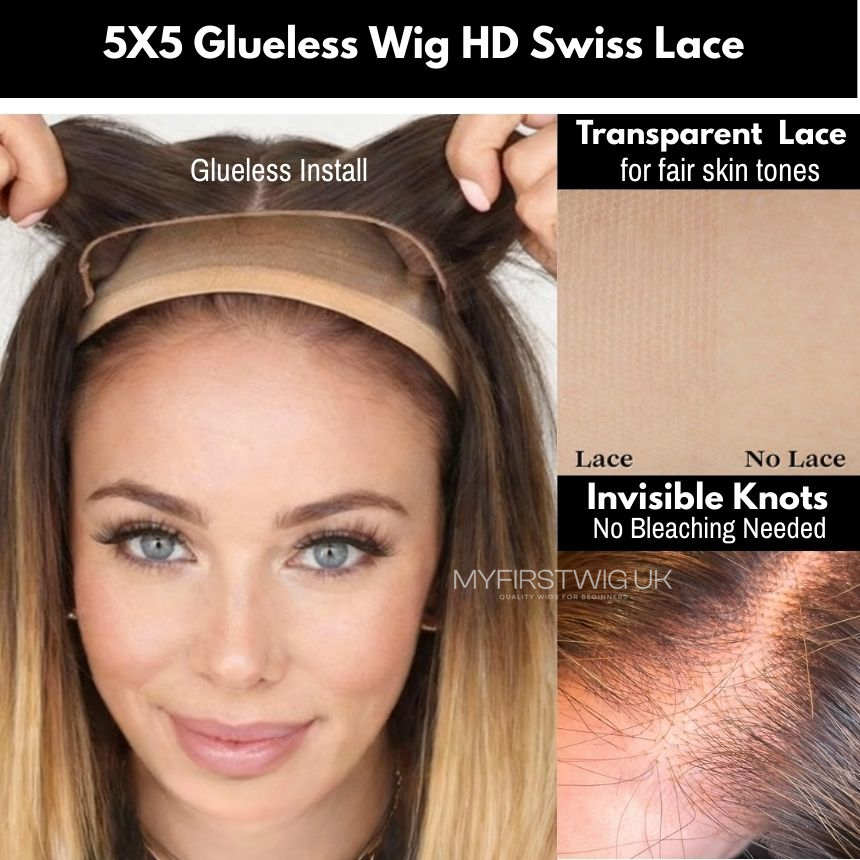
For wider thinning areas, a larger base may offer better coverage. MyFirstWig UK’s larger 9x9 inch toppers, for example, are described as suitable for progressive or more advanced thinning around the crown and back of the head.
Not Matching the Colour Closely Enough
A slight colour difference can be blended, especially with highlighted or rooted shades. But a very different colour may make the topper more visible.
Look at your hair in natural daylight and consider the colour at the mid-lengths and ends, not just the roots.
Pulling the Clips Too Tightly
A secure topper should not cause pain. If you feel pulling, tension or soreness, remove it and try again. Wearing clips too tightly in the same place every day may feel uncomfortable, especially if your natural hair is fragile.
Changing clip positions slightly and giving your scalp breaks can help improve