
Mastering the Art of Lace Wig Application: Step-by-Step Guide and Insider Tips
Lace wigs have revolutionized the world of hair transformations, offering endless possibilities for instant style changes. However, the key to achieving a natural and flawless look lies in mastering the art of proper wig application. In this comprehensive guide, we will walk you through step-by-step instructions and share invaluable tips for applying lace wigs, ensuring a secure fit, customizable hairline, and undetectable finish. Let's dive in!
Step 1: Prepping Your Natural Hair Before applying your lace wig, it's crucial to prep your natural hair properly. Start by washing and conditioning your hair, ensuring it's completely clean and tangle-free. Optionally, you may also braid or cornrow your hair close to the scalp to create a flat foundation for the wig.
Step 2: Prepping the Wig Thoroughly inspect your lace wig, checking for any loose hairs or imperfections. If needed, wash and condition the wig to optimize its manageability and appearance. Allow it to air dry completely or use a blow dryer on low heat settings.
Step 3: Securing the Wig Cap To ensure a secure fit, wear a wig cap that matches your skin tone or hair color. Carefully position the wig cap over your head and secure it using bobby pins or wig clips. This step helps provide a smooth foundation and prevents any discomfort during wig application.
Step 4: Customizing the Hairline To achieve a realistic hairline, begin by brushing the wig's hair away from the face. Then, using a pair of sharp scissors, carefully trim the excess lace along the wig's front hairline, leaving about a 1/8-inch strip of lace. Take your time during this step to ensure a clean and precise cut.
Step 5: Applying the Adhesive Choose an adhesive that suits your preferences and skin type, such as wig glue, adhesive tapes, or wig grip. Apply a thin layer of adhesive along the trimmed lace strip using a clean makeup brush or a cotton swab. Allow the adhesive to dry until it becomes tacky, usually in 5-7 minutes.
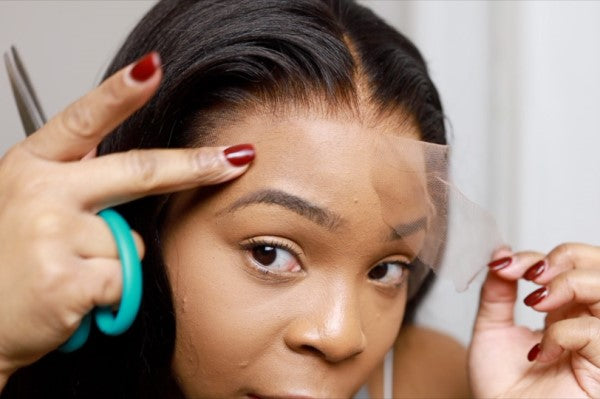
Step 6: Perfectly Placing the Wig Gently place the lace wig on your head, aligning the front hairline with your natural hairline. Press the wig down along the adhesive line, starting from the center and working towards the temples. Apply firm but gentle pressure, ensuring a secure bond between the wig and your scalp.
Step 7: Blending and Styling Once the wig is securely in place, use a wide-tooth comb or your fingers to blend your natural hair with the wig's hair. For a more seamless look, you can also use a little heat styling to blend the two hair textures together. Experiment with different hairstyles and partings to find your desired look.
Step 8: Concealing the Wig Cap To maintain a natural appearance, take a small amount of concealer in a shade matching your skin tone and apply it along the parting and hairline to conceal the wig cap. Gently blend the concealer using a makeup brush or your fingertips for a seamless finish.
By following these step-by-step instructions and insider tips, you are well on your way to becoming a pro at applying lace wigs. Remember, practice makes perfect, so don't be discouraged if it takes a few tries to achieve the desired look. With patience and regular practice, you'll soon be rocking your lace wig with confidence, garnering awe-inspired glances wherever you go. Now, it's time to unleash your inner diva and embrace the limitless versatility of lace wigs!


Leave a comment